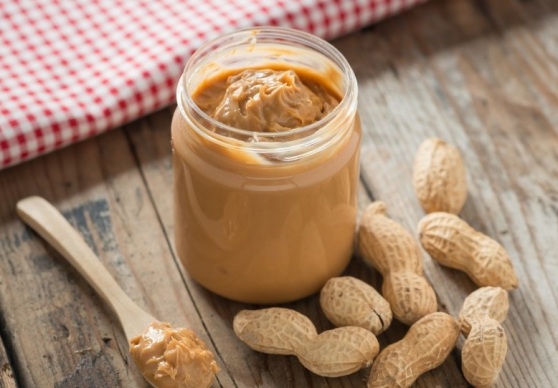
- 2 cups (299g) peanuts, dry roasted unsalted
- ¼ – ½ tsp salt (season to taste)


This sticky date cupcake is just perfect to satisfy a sweet tooth without actually having any process sugar. I used a little maple syrup to add to the dates natural sweetness. I preferred mixing this in the blender because it’s so quick and easy to pour. It is also gluten-free!
1 1/4 cups water
1 cup dates, pitted
3 ripe bananas, peeled and roughly chopped
2/3 cups coconut or almond flour
1 tablespoon vanilla extract
4 eggs
1 teaspoon maple syrup
1⁄2 teaspoon baking powder
Preheat oven to 270°F (185 C).
**Grease muffin tins and set aside.
Heat the dates and water in a small saucepan over low heat until the dates break down and thicken. Use a fork to mash them together and set aside.
Place the flour, egg, banana, vanilla extract and baking powder in a blender or food processor and mix well until well combined.
Add the dates to the banana mixture and combine. Evenly distribute into the ramekins or muffin tin. Cook in the oven for about 20-22 minutes.
** You can use paper cupcake cups but be aware due to the ‘stickiness’ part of this cake, the paper will stick to it.

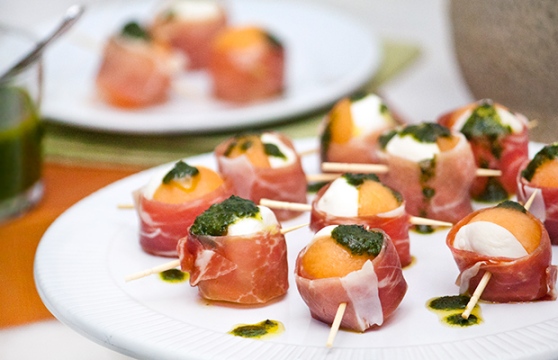
1 large ripe cantaloupe
1/4 pound thinly sliced prosciutto de Parma
8 ounces cherry-size mozzarella cheese balls
1 cup fresh basil leaves
1/2 cup extra-virgin olive oil
1/4 teaspoon salt
Cut the melon in half and remove the seeds. Using a melon baller, scoop out small balls of melon flesh. Then cut each ball in half. Cut each mozzarella ball in half as well. Cut the prosciutto lengthwise into ½-inch strips.
To assemble, place one mozzarella half and one cantaloupe half together and wrap the prosciutto around them. Skewer with a toothpick.
To make the pesto, process the basil, olive oil and salt together until well blended.
Top each melon-mozzarella ball with a drizzle of pesto and serve.
Total time: 25 minutes Yields 50
Nutrition (2 skewers per serving):
78 cal
7 g fat (2.4 g sat)
2 g carbs
120 mg sodium
0 g fiber
3 g protein

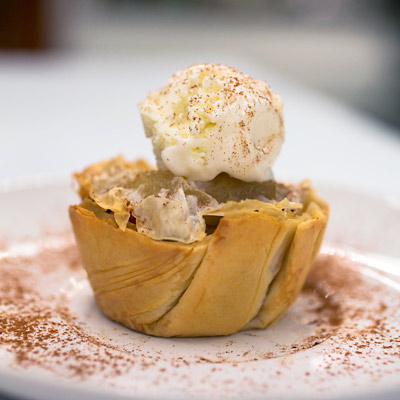
Candy apples are a decadent fall treat, but they’re loaded with sugar and calories. These rehabbed apple cups taste just as indulgent with all the gooey, seasonal goodness of fall, but contain just 144 calories a serving — that’s half the calories of a candy apple. Plus, the perfectly portioned apple cups are not only easier on your waistline, but on your teeth as well!
Serves 12
Ingredients:
Non-stick cooking spray
2 pounds Granny Smith apples, peeled, cored, and cut into ½-inch chunks
1/3 cup dried cranberries
Juice and finely grated zest of 1 lemon
2 tablespoons agave nectar
2 teaspoons freshly grated ginger
1 teaspoon ground cinnamon
½ teaspoon allspice
3 tablespoons butter, melted
2 tablespoons water
4 (9×16) sheets phyllo pastry, thawed
1 cup fat-free vanilla frozen yogurt
Directions:
Preheat the oven to 350°F. Coat a standard muffin pan with nonstick spray. Set aside.
In a large pot, combine the apples, cranberries, lemon juice, zest, agave, ginger, cinnamon and allspice. Cook over medium heat, stirring occasionally, until the juices in the pot thicken and very little syrup remains, about 10 minutes, set aside to cool.
In a small bowl, mix the melted butter and water. Unfold the phyllo, lay one sheet on a cutting board, and brush the dough with the melted-butter-water mixture — be sure to keep the pastry you are not working with covered with a damp towel to prevent it from drying out. Repeat three times, stacking the layers of dough on top of each other so that you have four layers.
Cut the stack of phyllo sheets three times crosswise and then cut again lengthwise twice so you have 12 even squares. Lay the phyllo squares in the wells of the muffin pan and gently press them into the cups, letting the edges fold and overlap naturally.
Spoon ¼ cup of cooled apple mixture into the phyllo cups. Bake for 12 to 15 minutes or until nicely browned. Let the apple cups cool in the pan before trying to remove them. Serve warm with a small spoonful of frozen yogurt.
Nutrition info. (per serving): Calories: 144, Total fat: 4 g, Saturated fat: 3 g, Cholesterol: 8 mg, Sodium: 74 mg, Protein: 2 g, Fiber: 4 g, Carbs: 27 g
We’re officially in the thick of winter, and just about everyone could use a little sunshine in his or her bones. According to the groundhog, we still have three weeks of cold weather left, but it’s time to take matters into our own hands. Enter ice cream.
You’d think the bone-chilling temperatures would be reason enough to put down the ice cream spoon, but members of Ice Cream Addicts Anonymous know this isn’t the case. Berries might go out of season but ice cream never does, so we’re bringing you five ways to make the frozen treat from the comfort of your own (warm) home — ice cream maker not required.
There are a number of ways you can enjoy your favorite dessert even if you don’t own an expensive ice cream maker and don’t want to make a run to the market. As it turns out, a lot of the time, you can make your homemade ice cream even healthier than the store-bought kind. Nothing beats the creamy goodness that is a summertime chocolate or vanilla soft-serve cone, but these alternatives certainly can help you get by until summer, when you can really go after the good stuff, or just simply perfect your own recipe.
We can all scream for ice cream in these five simple ways:
Up next is another technique that homemade ice cream aficionados might know of: the great ice cube method. This technique requires more steps than the banana soft serve and is less waistline friendly, but it yields a decadent flavor and texture that is closer in comparison to the commercially made thing, and that in itself is an accomplishment.
Once again, you’ll need a food processor for this recipe by J. Kenji Lopez-Alt at Serious Eats, but more people have access to this handy kitchen appliance than the expensive ice cream maker. You’ll also need some ice cube trays. Here are your steps to success for vanilla at-home ice cream via the frozen cube method:
Ingredients:
Directions: In large bowl or stand mixer fitted with whisk attachment, whisk egg yolks, sugar, vanilla, and salt until pale yellow and mixture falls off of whisk in thick ribbons, about 5 minutes. Set aside. Stirring constantly, heat evaporated milk in medium saucepan on stovetop until it comes to a simmer. Slowly add hot milk to egg mixture, whisking constantly, until fully incorporated. Transfer mixture back to saucepan and heat, whisking constantly, to 180 degrees Fahrenheit (it should become thick and custard-like). Do not overheat, or eggs will scramble. Chill mixture completely.
Whip 1 cup heavy cream with whisk or in stand mixer until doubled in volume. Add whipped cream to egg mixture and fold with whisk just until no lumps remain. Pour mixture into ice cube trays and freeze for 4 hours or until solid.
Combine frozen cubes of mixture (use a spoon or a dull knife to remove them) and remaining heavy cream in food processor and process until smooth, about 30 seconds, scraping down sides and breaking up lumps as necessary during the process. Transfer mixture to quart container and freeze for at least 4 more hours before serving.
Next up is another way to make your ice cream and eat it, too: the whipping cream method. Kevin and Amanda from KevinAndAmanda.com deserve credit for this foolproof ice cream method starring whipping cream and condensed milk, and we promise that it will not disappoint. This technique doesn’t require a food processor but rather a stand mixer or a strong arm.
You start off by whipping two cups of heavy cream until peaks form and then adding your toppings and fix-ins to a can of sweetened condensed milk. Next, you fold in the whipped cream mixture and then freeze before enjoying. Like the ice cube trays, this method is certainly more indulgent than the banana soft serve technique, but we think you’ll make an exception for the ice cream.
Here’s an example of how Kevin and Amanda mixed their cream and condensed milk to create cinnamon bun ice cream:
Ingredients:
Directions: Whip heavy cream to stiff peaks in large bowl. Whisk sweetened condensed milk, butter, cinnamon, and vanilla in large bowl. Mix well. Fold in whipped cream.
Pour into a 2-quart container and cover. Freeze 6 hours or until firm. Store in freezer.
Coming in at No. 4 is one technique that only requires you know how to shake. One fun indoor activity that parents can do with their kids to pass the long winter days is make ice cream in a bag — a Ziploc bag, that is. Though many people have their own technique, this method all comes down to your ability to shake up your ingredients once they’re zipped up safe in a bag. In a matter of 15 minutes, you can make your ice cream and eat it, which is more than some of the other recipes can guarantee.
Here is TableSpoon’s take on the technique:
Ingredients:
Directions: Take a small sealable (Ziploc-type) bag and add 1/2 cup of milk and 1 tablespoon of sugar. For added flavor, use 1/2 teaspoon of vanilla. Seal it up, getting rid of as much air as you can. Now double bag it inside a similar-size bag.
Throw 4 cups of crushed or cubed ice with 6 tablespoons of salt in a large freezer bag. You can use any kind of salt, as you won’t actually be eating it. Put in your little double bag, and seal the large bag around it, getting rid of as much air as possible.
Now, get shaking. Wrap the bag in a tea towel or use gloves and shake the bag for at least five minutes before checking on its progress. You’ll start to notice the mixture getting thicker by simply feeling through the bag. In eight minutes max, you should have your ready-to-eat ice cream, although it will take longer if you are mixing a large batch.
When you remove the smaller bag, wipe it down carefully to get rid of all the salt on the outside.
To round out the list, we come full circle and conclude with another healthy ice cream recipe, similar to the banana soft serve. These recipes have two things in common: they’re healthier than they taste and they’re both dairy free. Don’t believe it? Try it.
This recipe for voluminous homemade ice cream from Chocolate Covered Katie has a very light texture but yields a lot of ice cream for a dessert that really comes to around 40 calories. If you choose to use coconut milk or dairy milk, you will have a creamier taste, and the calorie count will also rise. The beauty is that it is all up to you. As long as you have some milk, a dash of vanilla extra and sweetener, and some shallow containers, you’re good to go. Use your food processor to see this little miracle happen right before your eyes.
Ingredients:
Directions: Mix the ingredients together in 1 or 2 shallow plastic containers. Freeze. Once frozen, pop the blocks out of the container and allow mixture to slightly thaw. Blend in your food processor until you have the desired consistency.